
I have been keeping this boxes saved somehow since the past 6 Months! My husband kept on saying "What are you going to do with these? They are taking up so much Space?"
But I always had something in mind and finally it took shape!


Disclaimer: Please Read Carefully
I made this for my 2.5 year old, this is suitable for 2 years and up because of the materials used. I have used e few small objects as she doesn't put anything in mouth. However you know your child best so do keep in mind what could be a chocking hazard or a threat to your kid and choose your materials wisely. Thanks.
It took me about 2 Weeks to complete this fully, so let me warn you beforehand that this is a long post loaded with pictures!
Gather Your Materials (Please NOTE many of these are Optional)
Anyways, let's start
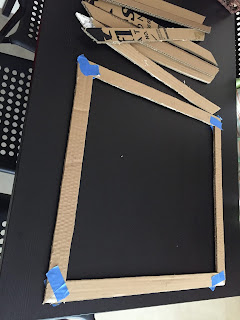
I have used two same sized boxes one from the dishwasher and other is a washer dryer one and the third medium one for the roof is one of our moving boxes


Do the same with the medium box too,
Next join together the open sided of the roof to make a triangular shape, tape the flaps
Cut off the side leaving 5-6 inches border


Next cut off one side of each of the large boxes, save these to use later
These will be joined to make a big house


Use one of the sides to create a flat roof for the other half of the house

 Cut the flaps of the roof to and glue them upCut to make a window


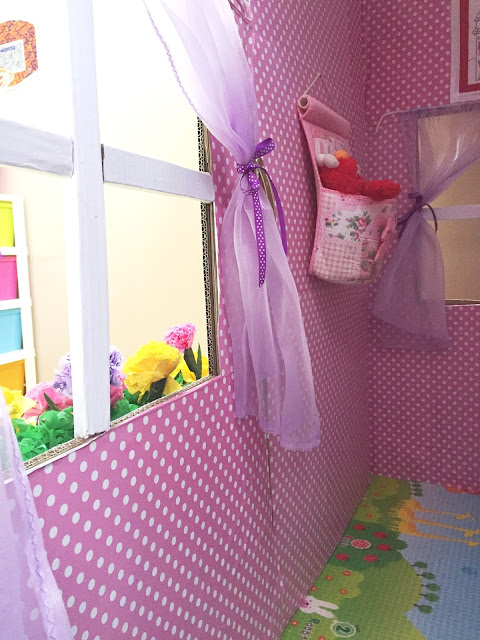
Cut the bigger windows for the house you can choose how many you like I have 3 large windows one in front and two on the sides
You can either cut off the whole square or rectangular shape OR you can cut from three sides and leave a flaps to open and close
You can also cut four small squares leaving a plus sign/ muntin on window frame since I wanted it to be more strong I made the frame separately


Prepare the plus shaped muntin by cutting about 1.5" strips of cardboard I doubled them up to make them stronger, for the large windows you will need three large pieces and 6 small pieces
Cut for the mini roof window/ventilator too tape or glue the two pieces together


Initially while wet it may look crumpled but it finishes nicely once the glue is dry


Finish the inside


I glued the paper on the whole interior but you can leave the door from inside and paint it later
For the exterior I cut out the A4 size Red card Stock into three pieces to make bricks, again you can choose to paint this if you like


Apply on all walls leaving the door, Cut to make the door from one panel, as you can see in picture cut below the three red bricks


Now attach the top brick part of the door to the wall


Make a border for the door which is slightly bigger so that it hides any gaps, if you like you can also add panels on the door, I decided to go just with a frame


 Painted them all Gold Metallic


Since I wanted to move her Kitchen Inside her home, I made a Mini Cupboard using a Small Cardboard Box to get about 18" Height
Make it Upright like in Picture and cut off the smaller flaps and glue them inside to make shelves, paint it and attach the knobs


To make more floating shelves cut and paint smaller boxes as per your liking


Cut and paint a few of these to make corner shelves
You can make a mini side table using cake cardboard base and glue kitchen paper rolls, paint if you like


For the Ceiling Pendant, poke a hole in the center of the roof, drop in your battery fairy light, tape the battery box at the back of the roof, insert the light into a paper lantern and you'll have a pretty pendant light!


Now comes the fun part!


But I always had something in mind and finally it took shape!
Before

After

I made this for my 2.5 year old, this is suitable for 2 years and up because of the materials used. I have used e few small objects as she doesn't put anything in mouth. However you know your child best so do keep in mind what could be a chocking hazard or a threat to your kid and choose your materials wisely. Thanks.
It took me about 2 Weeks to complete this fully, so let me warn you beforehand that this is a long post loaded with pictures!
Gather Your Materials (Please NOTE many of these are Optional)
- Cardboard Boxes 2 Large
- Cardboard Box 1 Medium (Width Larger than the width of the Large Box)
- Some more card boxes a few mini ones and a Small one about 15" -17" on longer side
- Cereal Box
- White Glue
- Glue Gun
- Decorative Paper
- Card Stock
- A meter or so Wide Corrugated Paper Roll
- Scissors
- Pen Knife
- Acrylic Colors
- Paper Tape
- Binder Clips Baby
- Food Pouch Caps
- Fabric
- Drawstring
- Mini Foam Mattress
- Elastic String
- Strings Battery Lights
- Used Cake Cardboard Base
- Empty Kitchen Towel Rolls
- Empty Paint Bottle
- Leftover yarn
This is the list of what I used but you can change it and use whatever suits you like use paint instead of paper or hot glue instead of white glue, I prefer white glue over hot glue so I have mostly used that even though it took time to dry up, with glue gun I burn myself more and I hate to clean those thousands of thread like strings afterwards! and still they never seem to go!There are many things like decorations etc which you can totally skip so I suggest if you plan to make this first go through it once so that you can decide what all you want to use and what to skip.
I have used two same sized boxes one from the dishwasher and other is a washer dryer one and the third medium one for the roof is one of our moving boxes

First of all remove any pins from the joint and open up the 2 large boxes or if it is glued just cut it open

Do the same with the medium box too,
Next join together the open sided of the roof to make a triangular shape, tape the flaps
Cut off the side leaving 5-6 inches border


Next cut off one side of each of the large boxes, save these to use later
These will be joined to make a big house


Use one of the sides to create a flat roof for the other half of the house

 Cut the flaps of the roof to and glue them upCut to make a window


Cut the bigger windows for the house you can choose how many you like I have 3 large windows one in front and two on the sides
You can either cut off the whole square or rectangular shape OR you can cut from three sides and leave a flaps to open and close
You can also cut four small squares leaving a plus sign/ muntin on window frame since I wanted it to be more strong I made the frame separately


Prepare the plus shaped muntin by cutting about 1.5" strips of cardboard I doubled them up to make them stronger, for the large windows you will need three large pieces and 6 small pieces
Cut for the mini roof window/ventilator too tape or glue the two pieces together


Prepare the outer Frames but cutting cardboard strips according to the size of your window, cut angular at edges to join, glue and paint it


Cut slits on the flat roof to make skylight


Cut the extra Roof from the back measuring your house and glue the cut off piece to the back of the roof to complete it


Also join big boxes from the the back
You can choose to paint it or just glue wrapping paper, I used these two types


Initially while wet it may look crumpled but it finishes nicely once the glue is dry


Finish the inside


I glued the paper on the whole interior but you can leave the door from inside and paint it later
For the exterior I cut out the A4 size Red card Stock into three pieces to make bricks, again you can choose to paint this if you like


Apply on all walls leaving the door, Cut to make the door from one panel, as you can see in picture cut below the three red bricks

Just fold the cardboard from the remaining side so that it can swing

Now attach the top brick part of the door to the wall


Make a border for the door which is slightly bigger so that it hides any gaps, if you like you can also add panels on the door, I decided to go just with a frame

Paint the inside of the roof tops white,
As you can see I had a lot of help doing this :)


Paint the door, I was given clear instructions that the door has to be Purple!

Cut out and paint Cardboard Number, Door handle, Door decor if you wish
For handle I used these plastic ones that you find on many boxes like the one here on markers


 Painted them all Gold Metallic
Also colored this Welcome sign


Since I wanted to move her Kitchen Inside her home, I made a Mini Cupboard using a Small Cardboard Box to get about 18" Height
Make it Upright like in Picture and cut off the smaller flaps and glue them inside to make shelves, paint it and attach the knobs


To make more floating shelves cut and paint smaller boxes as per your liking


Also made a Vase with the empty paint bottle and some leftover yarn, just glue and wrap the yarn around the bottle


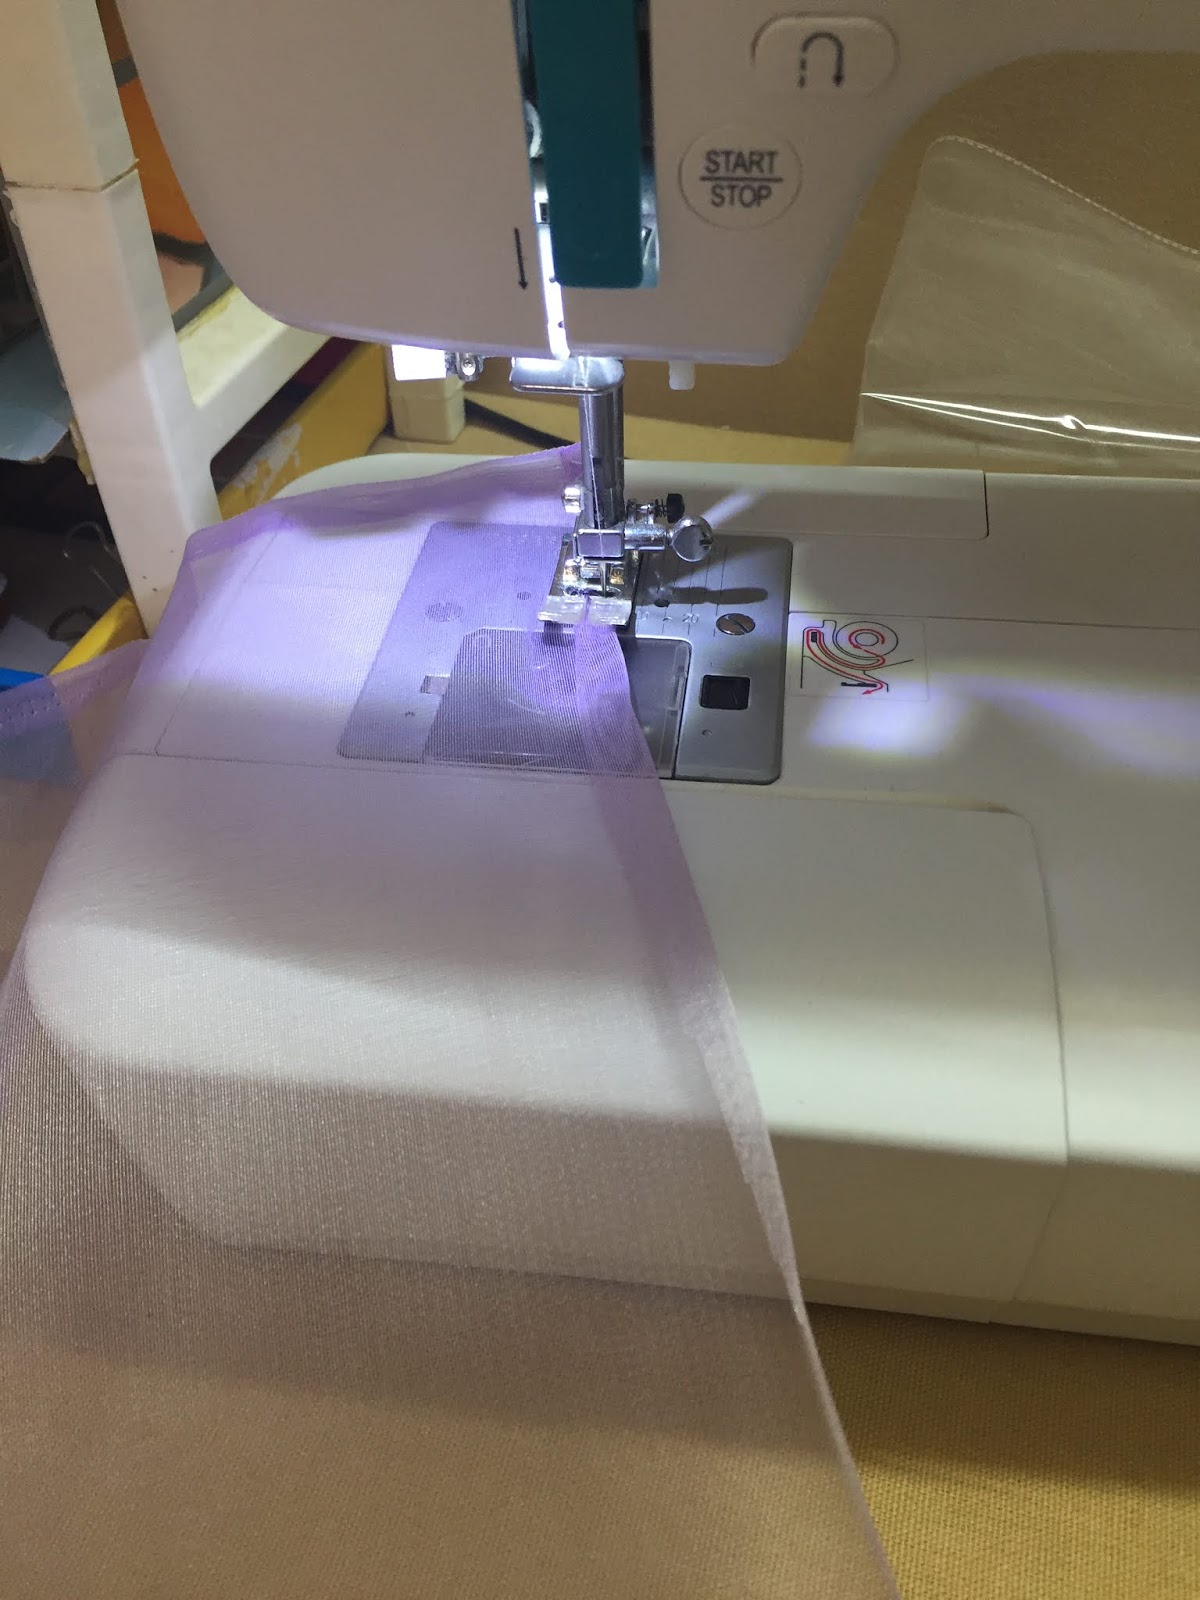
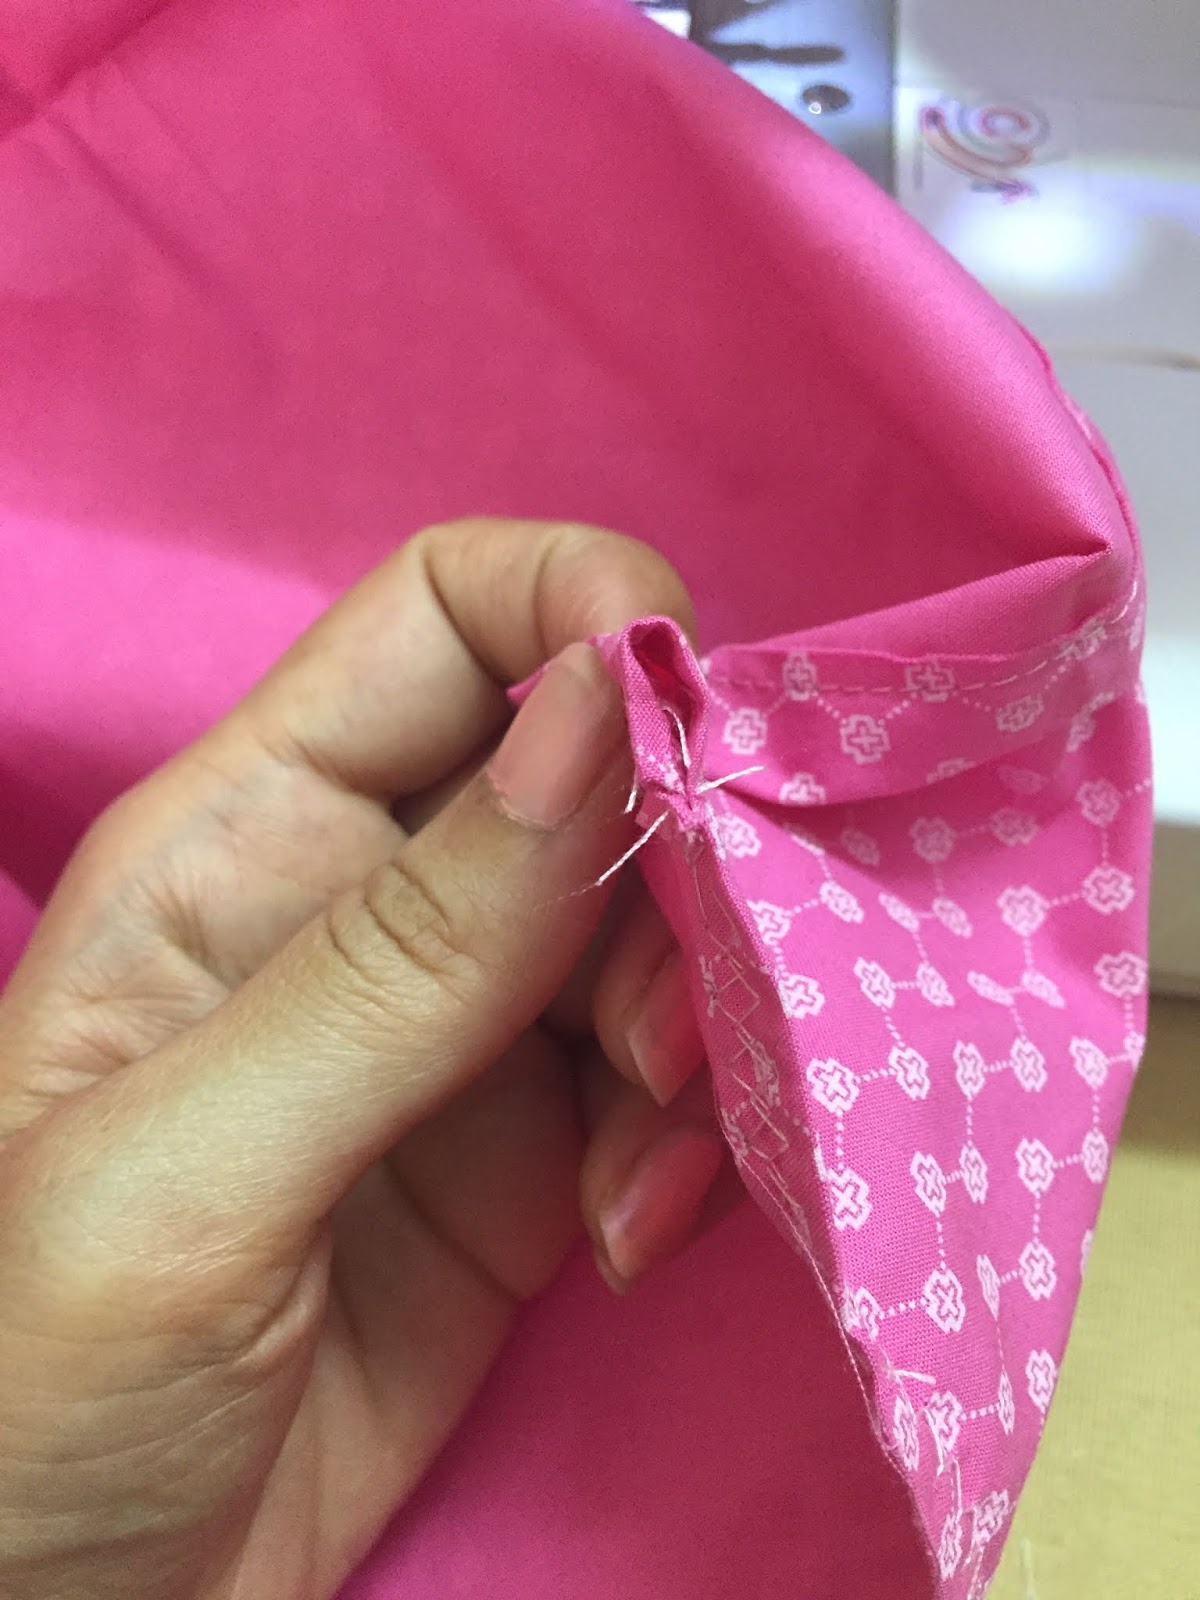
To make curtains I used this left over decorative sheer fabric from my Daughter's First Birthday party, cut to size and sew the edges, remember to leave one side open to string in the drawstring
For kitchen curtain I used a pink left over fabric


Cut and paint a few of these to make corner shelves
You can make a mini side table using cake cardboard base and glue kitchen paper rolls, paint if you like


Use a Cereal Box to make a planter, cut in half lengthwise, cut off one smaller side of one of the pieces and then join the two parts as per the size of your window, cover with paper or paint


Glue to the window and fill in with Flowers

Use the corrugated sheet to cover both the roofs or you can paint them


I used this old crib mattress to make a mini sofa,


For the Ceiling Pendant, poke a hole in the center of the roof, drop in your battery fairy light, tape the battery box at the back of the roof, insert the light into a paper lantern and you'll have a pretty pendant light!


The structure is done so now comes decorating Glue up the house number, wreath or sign, hot glue the curtain string
I used my Daughter's Art work for wall art
You can decorate and do the interiors as you like


Now let's take a Home Tour,
You can see the lovely light coming in from the Skylight and the floating shelves are proving to be quite useful! Added more Storage with the corner shelves because storage is very important!
I also used the Old Stroller fan in the Kitchen
Added some more lights on the roof
So much effort but all of it was worth it! My little one enjoys it everyday!


Time to say Goodbye,If you make it don't forget to share the pictures with me, if you have any questions fell free to drop a message!


Happy Crafting,

This is brilliant and so fun! I particularly love the addition of the ceiling pendant. Your daughter must be loving her playhouse. I imagine kids who are a little older could help with parts of the process making one too.
ReplyDeleteThanks Val! Yes, Oh yesss, She loves it!
DeleteGreat! Well done! This reminds me of my childhood. My brother and I loved to make houses out of big boxes which my parents carried home from supermarket.
ReplyDeleteThank You :), Yup they r so much fun!
Deletewow stunning blog post!!
ReplyDeleteJadieegosh Instagram
Very informative article. For more details about roof you can view here. There are many types of materials used for roofing, JSW Roofing Sheets is one of them. If you want the roof to withstand for a long time then you can also consider placing color roofing sheet.
ReplyDeleteI'm so amazed by your creativity. The kid toy house you made from those cardboard boxes looks fantastic. Such a wonderful mini house! The details are amazing. I'm sure your kid will enjoy it and what is more, you're teaching her (it is a girl?) about the values of creative work. I also loved that you used your daughter's art for walls. Such a great and inspiring project!
ReplyDeletehttps://modaodaradosti.blogspot.com/
good one
ReplyDeleteCorrugated Boxes
Custom Corrugated Boxes
Wholesale Corrugated Boxes
Wholesale prinetd Corrugated Boxes
Live Chat Judi Agen Sakong Online itu99
ReplyDeleteAgen Judi Slot Games Online IndoWinBola
Agen Judi Sbobet Online QBet99
Situs Judi Sportsbook Online IndoWinBola
Cheat Judi Game Poker online
Ngentot Temanku Dhea
Nikmati Tubuh Mulu Ibu Sekdes
Tertidur Dengan Baju Terbuka
Thanks for an interesting blog. What else may I get that sort of info written in such a perfect approach? I have an undertaking that I am just now operating on, and I have been on the lookout for such info. kartonska embalaža po meri
ReplyDeleteWow Awesome DIY. Thanks for this awesome kids activity with the cardboard boxes UK.
ReplyDelete